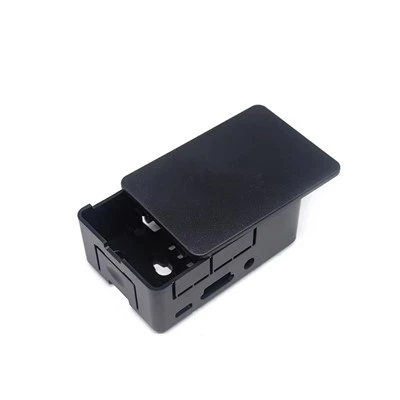
Sink marks are shallow depressions or low spots that appear on the surface of an injection molded part. They are most commonly found in thicker areas, near ribs, bosses, corners, or other features where the plastic cools unevenly. Although they may seem like a minor cosmetic issue, sink marks can affect product appearance, dimensional consistency, and customer perception of quality.
For manufacturers of plastic housings, lighting components, appliance parts, and consumer products, understanding why injection molded parts have sink marks is essential. The good news is that many sink-mark problems can be reduced-or prevented-through better part design, suitable material selection, well-designed tooling, and controlled injection molding parameters.
What Causes Sink Marks in Injection Molding?
During injection molding, molten plastic is injected into a mold cavity and then cooled until it becomes solid. As the material cools, it naturally shrinks. If a thick section cools more slowly than the surrounding area, the outer surface may solidify first while the plastic inside continues to shrink. This internal shrinkage can pull the surface inward and create a visible sink mark.
The most common causes include:
- Uneven wall thickness
- Excessively thick ribs, bosses, or structural features
- Insufficient packing pressure or holding time
- Poor gate location or restricted material flow
- Inadequate cooling in thicker mold areas
- Material shrinkage characteristics
- Mold design that does not support uniform filling and packing
Sink marks are often a result of several factors working together. For this reason, solving the issue requires a practical review of both the product design and the molding process.
Part Design: The First Line of Defense
Good part design is one of the most effective ways to prevent sink marks. Maintaining consistent wall thickness allows plastic to cool more evenly and reduces differential shrinkage across the part.
When ribs or bosses are required for strength, assembly, or fastening, their thickness should normally be lower than the main wall thickness. A rib that is too thick can create a heavy material concentration behind the visible surface, increasing the risk of sink marks. Proper rib design, gradual transitions, and suitable corner radii can all improve molding stability.
At BMA, engineers review wall thickness, draft angles, structural details, and assembly points before mold manufacturing. This Design for Manufacturability review helps identify features that could cause quality or production problems, allowing improvements to be made before tooling begins. BMA's custom injection molding service is designed to support customers from design evaluation through production.
Tooling and Gate Design Matter
Even a well-designed plastic part can develop sink marks if the mold is not optimized. Mold design affects how molten plastic flows, packs, cools, and solidifies inside the cavity.
Gate location is especially important. The gate should allow the material to fill the part efficiently and maintain pressure in areas that are more likely to shrink. If the gate freezes too early or is located too far from a thick section, the cavity may not receive enough packing pressure during the holding stage.
Cooling-channel layout is another critical factor. Thick sections need sufficient cooling control to reduce temperature differences throughout the part. A well-designed mold helps achieve a more uniform cooling rate, improves cycle stability, and supports consistent part quality over repeated production runs.
BMA manufactures injection molds in-house, enabling closer control of machining accuracy, mold assembly, trial production, and mold performance. This integrated capability helps the team evaluate real production conditions and refine tooling when necessary. Learn more about BMA.
Process Settings Can Reduce Sink Marks
Injection molding parameters also have a direct effect on sink marks. Insufficient holding pressure, short holding time, or an early gate freeze can leave the part under-packed. As the core material cools and shrinks, the surface may sink inward.
Depending on the material and part geometry, manufacturers may adjust:
- Packing pressure
- Holding time
- Injection speed
- Melt temperature
- Mold temperature
- Cooling time
- Screw recovery and cushion control
However, process changes should be made carefully. Increasing pressure alone is not always the correct solution. Excessive pressure may create flash, stress, or other defects. The best results come from balancing material behavior, mold design, part geometry, and machine settings.
Material Selection and Shrinkage Behavior
Different plastics shrink at different rates. Materials such as PP, PA, POM, ABS, and PC have unique flow, cooling, and shrinkage characteristics. The right material choice depends on the product's structural requirements, appearance, environmental conditions, and functional performance.
Before production, it is important to consider whether the material is suitable for the part's wall thickness and surface requirements. For visible cosmetic parts, especially housings and lighting-related components, material selection and mold surface quality should be reviewed together.
How BMA Controls Molding Quality
Preventing sink marks requires quality control from initial design through final inspection. BMA supports custom injection molding projects with mold design, in-house mold manufacturing, prototype and low-volume production, secondary processing, and quality inspection.
Our team produces plastic parts based on customer drawings or samples and supports multiple materials, structures, and order quantities. From raw-material checks to final inspection, BMA applies quality procedures to help ensure that injection molded parts meet customer requirements consistently. The company's manufacturing capabilities include over 6,000 square meters of production space, an in-house team of over 50 members, and experience serving global customers. View BMA's manufacturing capabilities.
If your injection molded parts have sink marks, sending us your 3D file, drawing, or sample is a practical first step. Our engineers can review the part design and provide manufacturing recommendations before production begins.